Projects
The function of a project is to group and manage all entities related to designing, publishing, developing, and analyzing a group of APIs.
Therefore, the project structure is one of the most important structures in Apinizer.
API Proxies categorized under a purpose framework and their related connections and configurations make management related to the API lifecycle easier.
Apinizer provides a Default project on first installation. This Default project cannot be edited or deleted.
After project definition is made, members are generally defined according to their roles. Click here for detailed information about member definition.
Project Creation
All projects in Apinizer can be viewed from the Management → Projects screen or a new project can be created.
A project can be created in two ways:
- A new project definition can be made with the New (Create) button.
- A project can be created by loading an existing project configuration file by clicking the Import Project link.
The visual containing the project list is provided below:
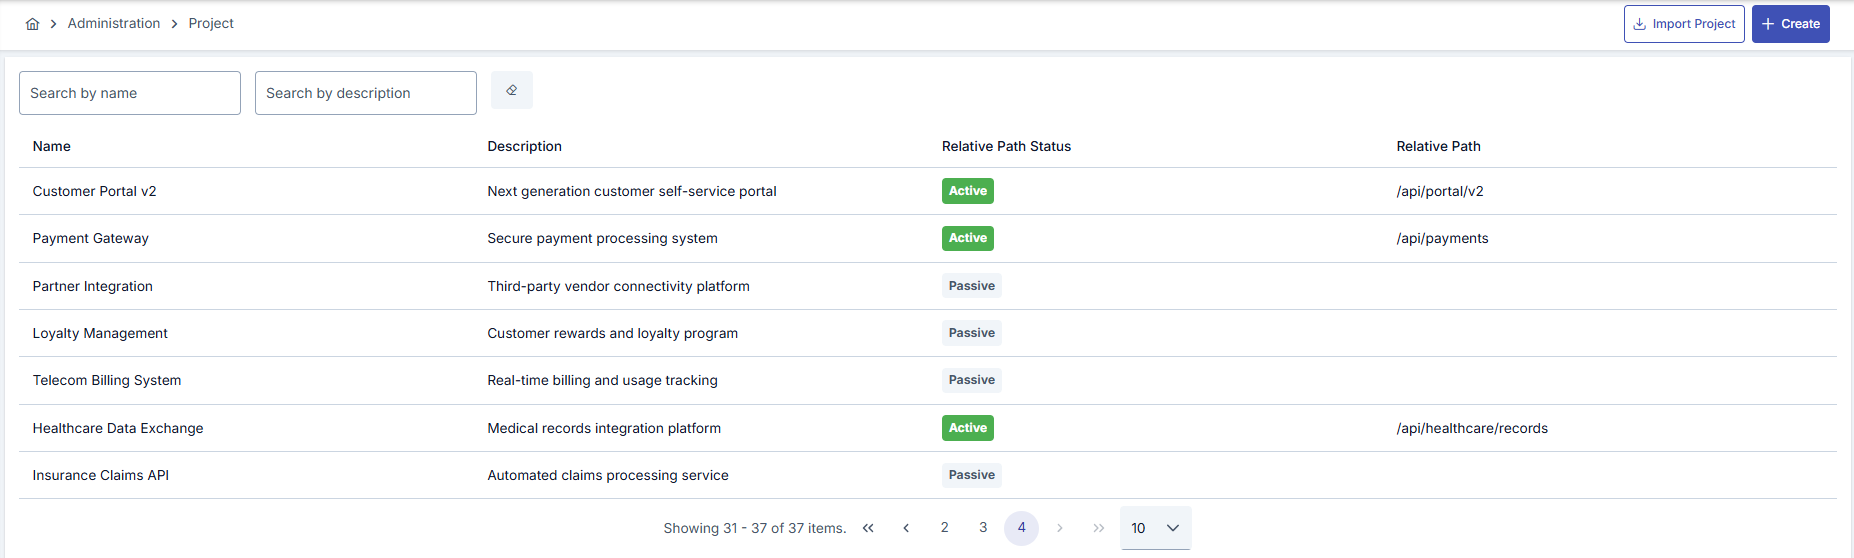
If a user with Project Owner role is deleted from that project; Admin user becomes Project Owner for that project.
The visual containing project settings is provided below:
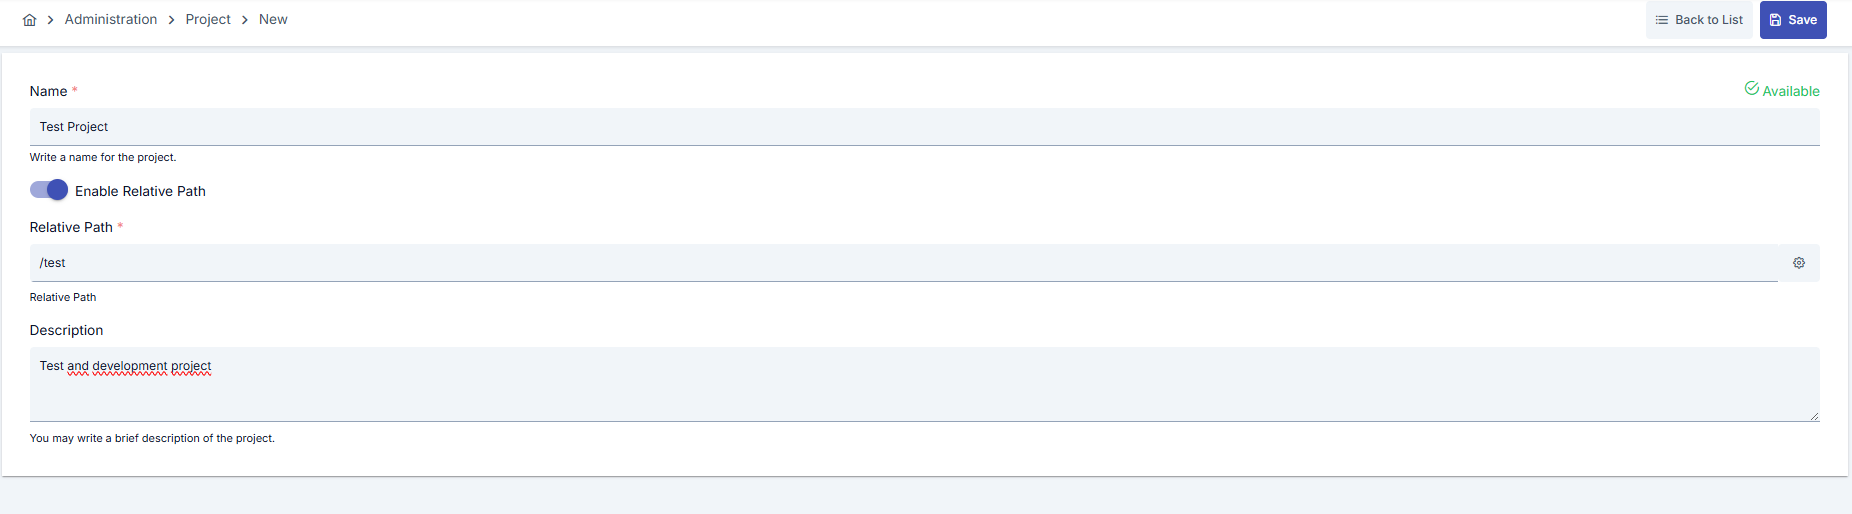
The fields used for project configuration are shown in the table below.
| Field | Description |
|---|---|
| File Upload (Project) | This field appears on the screen when an exported version of an existing project will be imported as a new project via the "File Upload" link and is used to upload the .zip file to be imported. |
| Name | Project name information for the created project. |
| Enable Relative Path (Enable Relative Path) | Activated if a common prefix is desired to be used in all gateway addresses within the project. |
| Relative Path (Relative Path) | The prefix expression that all Gateway addresses defined in the project will start with is entered in this field. An automatic UUID is given by the system. For example; when the project gateway address is "account", the API proxy gateway address appears as: /account/proxy1 |
| Description | A description can be written to facilitate management related to the created project. |
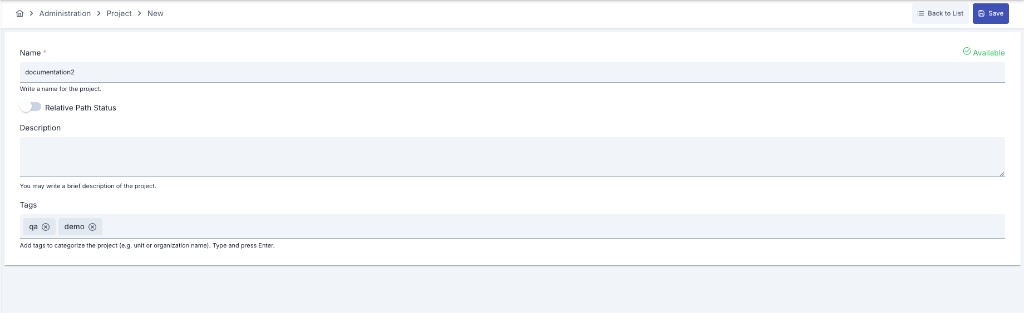
| Tags | Multiple tags can be added to categorize the project (for example by unit or organization name). Tags are entered as free text, each one added by pressing Enter. |
| Skip conflicting consumers (Import) | Only shown on the Import Project screen. Off by default. See How a Project Import Proceeds below for what changes when it is turned on. |
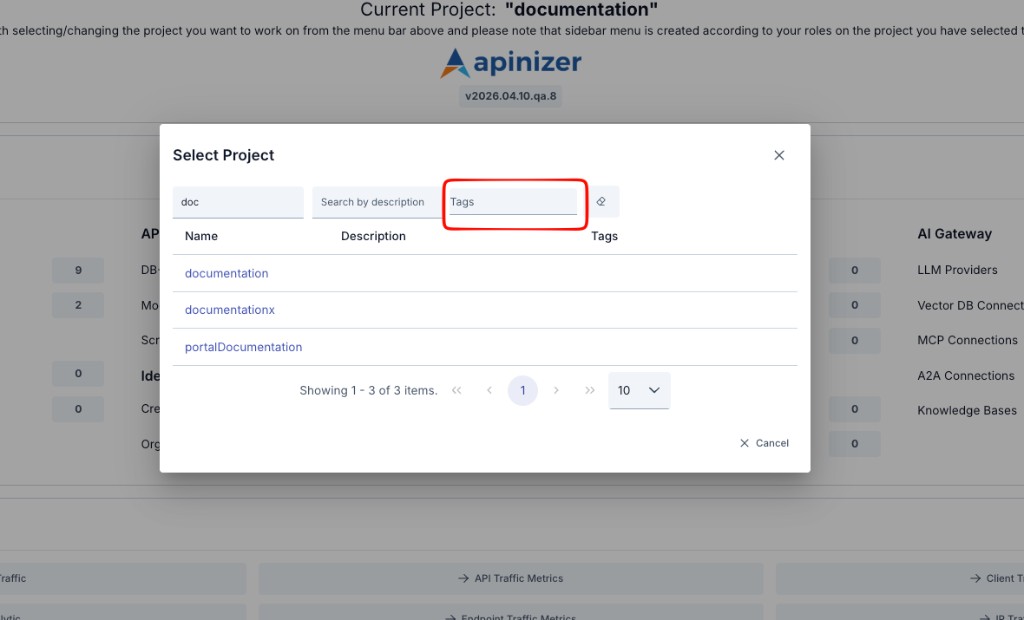
In the project selection window located at the top of the screen, projects can also be filtered by name, description, and tags. The tags belonging to each project are displayed in the list.
How a Project Import Proceeds
Importing a project package runs in the background. After you click Import on the Import Project screen, a progress indicator and the note "The import is running in the background" appear; the screen updates itself as soon as the result is ready.
The package integrity check runs before the background job starts. If the package differs from the way it was exported, the screen asks you to confirm ("the package was modified — import anyway?"); if you decline, the import never starts and no new project appears in the list. If you confirm, the import proceeds in the background as usual.
If the import completes successfully, a success message is shown and you are taken back to the project list, where the new project appears.
If the import fails, the reason is shown on the screen and you stay on the same page, so you can correct the package and try again. A failed import never leaves a half-built project behind: the records created during the attempt are rolled back, so no unusable project appears in the project list.
A project export always includes the project's consumers, and consumer usernames are unique across the whole installation. Re-importing a project on the same installation — or into any installation that already holds one of those usernames — is therefore refused with a "consumer username already exists" reason, and no project is created, unless the Skip conflicting consumers checkbox described below is turned on.
Skip conflicting consumers is a checkbox on the Import Project screen, off by default.
- Off (default): behavior is unchanged from above — a package with any colliding consumer username is refused outright and nothing is imported.
- On: consumers whose username already exists on this installation are left out of the import, along with anything that belongs to them and has no other owner — their API clients, limit assignments and access entitlements. The rest of the package is imported normally, and the new project appears in the list. Before the success message, a warning lists how many consumers were skipped and their names, and a second warning (when applicable) lists the dependent objects that were left out with them. The same information is also written to the Application Logs as an info entry, so it remains available after the on-screen warning has been dismissed. You can bind the skipped consumers to the new project by hand afterward.
Turning the checkbox on never removes or changes an existing consumer on this installation — it only decides whether the incoming package's colliding consumer, and objects that belong only to it, are left out of the new project.
You can leave the page while the import is still running. The work continues on the server, and you can see the result in the Administration → Projects list — if the project is in the list, the import finished.